Why Buy Frozen Tuna?
Frozen tuna isn’t a compromise purchase — it’s a control purchase. When tuna is frozen properly, you’re buying consistency: the same weight, the same texture window, the same portion plan every time, without racing the clock the moment it lands in your fridge. That matters with tuna, because it’s a dense fish and small differences in handling show up fast.
Freezing also makes planning simpler. You can stock loins, portions, or steaks, take what you need, and keep the rest sealed. That means less “use it or lose it” panic, and far less trim waste from over-buying. For homes and caterers alike, frozen turns tuna into an ingredient you can schedule, not a risk you have to babysit.
On our Frozen Tuna page we describe fast handling as part of the quality system: tuna is processed and packed quickly after the catch, and the page states it is frozen at around -60°C within an hour after the catch, with a separate claim that fish is filleted, packed and frozen within 3 hours of being caught. The point isn’t to win a debate about “fresh” — it’s to lock in a known moment of quality, then keep it stable through storage and delivery.
Freezing slows spoilage. Rapid freezing protects texture. Stable cold preserves flavour.
Portions reduce waste. Consistent weights improve repeatability. Frozen stock improves planning.
Sealed packaging reduces air exposure. Cold chain handling protects quality. Labelled cuts simplify buying.
“Fresh” can be excellent — but time adds up through the supply chain. Frozen simply removes the guesswork by fixing the clock at the point you choose.
Choose Your Cut
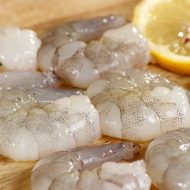
Fillets
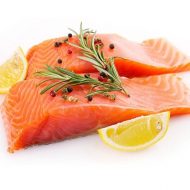
Tuna fillets are the flexible, “what’s-for-dinner?” option — ideal when you want one clean piece to portion yourself. They suit both oven roasting and pan-cooking, and they work across a wide range of recipes because you can slice them into medallions, cut thick steaks, or keep them as a single loin-style portion. If you like a quick midweek cook with minimal fuss, fillets give you control over thickness and doneness, whether you’re going for a gentle bake or a fast sear. Look for clear labelling on species, cut type, and whether the piece is a centre-cut loin or a mixed section, because that affects texture and flake.
Portions
Portions are all about speed and predictability. If you want portion control without a measuring scale and without leftovers you didn’t plan for, portions make life easier: same weight band, similar thickness, repeatable results. They’re the practical choice for weekly meal planning, packed lunches, or when you’re feeding different appetites at the same table. Portions are also a smart pick if you prefer consistent sear timing, because size and thickness are usually tighter than a full fillet. In short: portioned tuna is the “no surprises” cut.
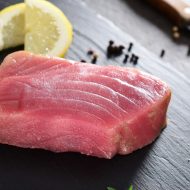
Steaks
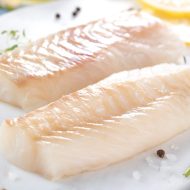
Tuna steaks are cut to hold their shape. They’re built for high-heat cooking — grill, griddle pan, or fast sear — with a sturdier structure that tolerates heat better than thinner slices. If you like a pronounced crust on the outside with a controlled centre, steaks are the natural choice. They’re also handy for bold marinades and spice rubs because the surface area-to-thickness ratio works in your favour. When you see “steak,” you’re usually looking at a cross-section cut from a loin, designed for clean presentation.
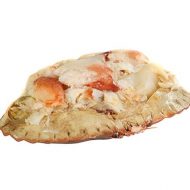
Whole Side or Large Fillet
A whole side (or large fillet) is for bigger plans: entertaining, smoking, batch prep, or slicing your own portions to match different cooking styles. This is where you get maximum value from the cut because you control portion size, thickness, and presentation — from thick loin slices to thinner pieces for quicker pan work. It’s also the go-to option if you want uniform slices for sharing platters or you’re prepping multiple meals in one session.
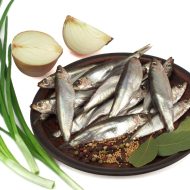
Whole Fish and Speciality Lines
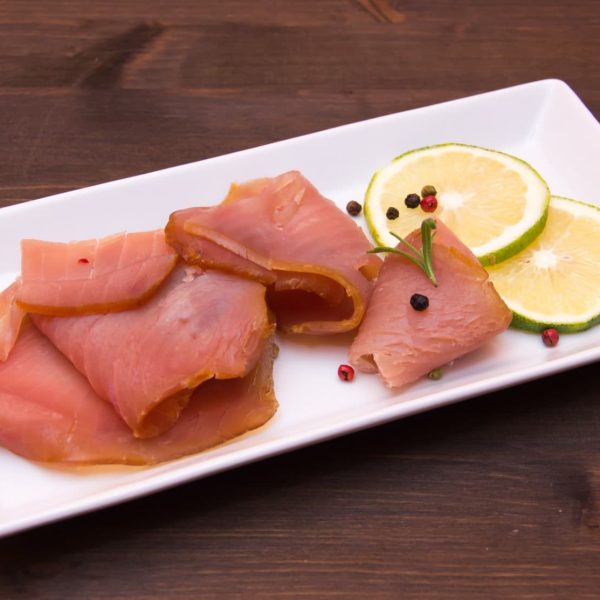
Whole gutted tuna is for confident hands — people who want to break down the fish themselves. It’s suited to those who enjoy slicing, roasting larger sections, or taking it apart into loins, steaks, and trim for mince-style mixes. If speciality tuna lines are stocked — smoked or cured products, gravadlax-style preparations, or sashimi-cut portions — treat them as ready for specific uses, with the cut and intended application doing the heavy lifting rather than broad promises.
Pick the cut that matches your pan, your timing, and your appetite.
What Arrives at Your Door
When you order Frozen Tuna from frozenfish.direct, the job isn’t just “get it there” — it’s keep it properly frozen, end to end, so the fish you unwrap matches the label you bought. Your order is dispatched by DPD overnight courier and prepared for cold-chain transit, not casual parcel post.
Each box is packed with dry ice in a polystyrene insulated box. That combination matters because it slows heat gain during the journey and helps keep the tuna frozen in transit, even when the outside world is doing what British weather does best: changing its mind. Dry ice maintains a deeply cold environment inside the pack, while the insulation reduces temperature swings, so the product arrives in a stable, freezer-ready condition.
Delivery timing is handled without guesswork. Orders placed before the stated cut-off are prepared for next working day delivery on eligible days, and checkout controls the valid delivery dates available to you. That means you’re selecting from dates the system can actually support, based on dispatch days and courier service windows, rather than relying on vague promises or conflicting cut-off times.
When your delivery arrives, treat it like a freezer handover. Open it promptly, check the packs, then move the tuna straight into the freezer so the cold chain stays unbroken. After that, follow the on-pack storage guidance for best quality and product-specific handling, especially if you’ve chosen different cuts or speciality lines that may have their own instructions.
Dry ice is simple to live with if you keep it sensible. Don’t touch it with bare skin; if you need to move it, use gloves or a cloth. Keep the area ventilated while you unpack, and never seal dry ice into an airtight container. Keep any remaining dry ice away from children and pets, and let it dissipate naturally in a safe, well-ventilated place. The goal is calm and controlled: frozen fish in, freezer shut, dinner plans intact.
Label-First Transparency
Buying tuna online is easy when the label does the heavy lifting. On frozenfish.direct, each Frozen Tuna item is presented with the practical details that actually change what turns up on your chopping board — so you can choose with confidence, not guesswork.
Every product clearly states the cut (fillet, portion, steak, whole side/large fillet, whole fish or speciality line), the weight or pack size, and the key prep facts that matter for real-world cooking. Where relevant, you’ll see whether it’s skin-on or skinless, and whether it’s boneless or pin-boned — because those details affect texture, portioning, and how much hands-on prep you’ll do before it hits the pan or oven. If “wild” or “farmed” applies to a specific item, that’s shown at the product level too, so you’re not buying into a vague category-wide claim that doesn’t match the pack.
Origin and catch area can vary by product and by supply line, so we don’t blur it into a single sweeping promise. If that information is available for an item, it’s shown on the product details, where it belongs — next to the specific cut, size, and format you’re choosing.
Allergen clarity is non-negotiable. Fish is clearly flagged on every tuna product, and for any smoked, cured, or seasoned lines the ingredients are listed on the product details so you know exactly what you’re buying beyond the fish itself.
- Cut drives cooking. Weight drives timing. Skin drives texture.
- Origin informs preference. Method informs fat level. Pack size informs value.
- Boneless cuts reduce prep. Pin-boned cuts reward care. Portions standardise results.
- Ingredients define flavour. Allergens protect households. Labels prevent surprises.
Storage and Defrosting
Frozen Tuna is at its best when you treat it like a texture project, not a panic exercise. The goal is simple: keep it properly frozen until you’re ready, then defrost in a way that protects firmness and flavour — without turning the surface watery or the flesh soft.
For storage, keep tuna fully frozen and keep air out. Most items arrive vac packed, which helps a lot, but once a pack is opened the enemy is exposure: air dries the surface, dulls the colour, and increases the chance of freezer burn. If you’re splitting a larger cut into portions, re-wrap tightly and minimise trapped air. Think like a prep kitchen: keep packs flat where you can, avoid constant door-opening, and rotate your stock so older packs are used first — older packs forward makes weeknight cooking smoother.
For defrosting, the default is the fridge. It’s the most predictable route for texture and it’s the least dramatic. Keep the fish contained as it thaws — on a tray, in a dish, or inside a sealed container — because you want control of any drip loss, not a puddle roaming your fridge. When it’s thawed, open the pack and deal with the surface properly: pat dry with kitchen paper. That single step is the difference between a clean sear and a grey, watery steam. Tuna is often firm by nature, but a damp surface steals heat and softens the outside before the middle is ready.
Texture-wise, different cuts behave differently. Portionable pieces are easy to plan and tend to defrost evenly. Skin-on cuts can hold moisture at the surface, so patting dry matters even more. If a product is pin-boned where relevant, take a moment to check before cooking — it’s quicker than discovering it mid-bite. Tuna steaks and fattier cuts generally forgive heat better; leaner pieces can turn soft if they’re handled roughly or left to sit in excess liquid.
On refreezing, keep it conservative. If tuna has been properly thawed in the fridge and kept cold, some products may allow refreezing, but quality can drop fast and safety rules vary by item. When in doubt, don’t refreeze — and always follow the on-pack guidance first. The win is consistency: steady cold, minimal air exposure, controlled thawing, and a dry surface before the pan.
Cooking Outcomes
Crisp skin (skin-on)
Skin-on tuna rewards a simple discipline: make sure the surface is dry, then commit to heat. Start with a properly hot pan and a light film of oil, lay the fish down skin-side first, and leave it alone until the skin releases and looks visibly crisp at the edges. You’re looking for a change you can see and hear: a steady sizzle, a dry surface, and skin that turns glassy rather than limp. Flip briefly for colour, then finish gently so the centre stays juicy rather than tightening into a dry, chalky bite. Dry surface equals better sear. Gentle finish protects moisture. Resting evens temperature.
Oven-roast fillet
Fillets are your “clean, controlled” option when you want even cooking without chasing a perfect pan crust. Roast with steady heat until the outside turns opaque and the flesh firms up, but the centre still yields slightly when pressed. Watch for cues: the surface should look set, the layers should separate cleanly with a fork, and the juices should stay clear rather than flooding the tray. Thickness changes timing. Fat content changes forgiveness. Skin changes crisp.
Pan-fry portions
Portions are built for repeatability: predictable sizing, fast cooking, and easy portion control. Start on gentler heat so the outside doesn’t race ahead of the middle, then increase slightly to finish with colour. Don’t overcook — tuna shifts from tender to dry quickly, and the best cue is feel: the centre should remain springy and moist, not rigid. Give it a brief rest off the heat so the texture settles and the moisture redistributes. Thickness changes timing. Fat content changes forgiveness. Skin changes crisp.
Grill steaks
Steaks are the high-heat workhorses: they hold shape, take a sear well, and stay grill-ready without falling apart. Use confident heat and watch the edges — they’ll turn opaque first, creeping inward as the centre stays juicy. Aim for strong surface colour without drying the middle; the steak should still have a little give when pressed and should slice cleanly without crumbling. Dry surface equals better sear. Gentle finish protects moisture. Resting evens temperature.
Cured, smoked, and sashimi-style tuna products have different handling expectations and may be ready-to-eat or intended for specific uses, so follow the product details on the pack and the listing for the correct approach.
Nutrition Snapshot
Tuna earns its place in the freezer because it’s a straightforward, protein-rich fish that cooks with purpose. Many tuna products are also commonly associated with omega-3 fats, which is part of why people reach for it when they want a satisfying, “proper meal” result without overthinking it. That said, tuna isn’t one uniform thing: nutrients vary by species, cut, and whether it’s wild or farmed, and the most accurate view is always the specific product details on the item you’re buying.
From a practical buying point of view, the nutrition story and the cooking story overlap. Leaner cuts tend to feel firmer and can dry out faster if you push the heat too hard or run the cook too long. Fattier cuts are often more forgiving, staying juicier through higher heat and giving you a richer mouthfeel. Thickness matters too: a chunky steak behaves differently to a thin portion, even if they came from the same fish. Protein structure sets as it cooks, fat carries flavour, and the balance between the two shapes your “juicy centre” vs “firm bite” outcome.
If you’re planning meals around a balanced diet, tuna can be an easy, dependable centre-of-plate choice—especially when you match the cut to your cooking method and timing. Use the product details as your guide for what you’re getting, then choose the format that fits your week: quick portions for midweek speed, steaks for grill confidence, or larger pieces when you want to slice your own servings.
The goal isn’t a wellness slogan—it’s a confident, informed pick that cooks the way you expect.
Provenance and Responsible Sourcing
Buying Tuna with confidence isn’t just about the cut — it’s about knowing what you’re actually choosing. That’s why we keep provenance practical and SKU-specific: we show method and origin details per product so you can choose what fits your preferences. Provenance supports preference. Clear labels support trust. Evidence supports claims.
Because Tuna is a broad category, it’s not honest to make one sweeping statement that covers every item. Different products can come from different fisheries or farms, different regions, and different production methods — and those details matter to different people for different reasons. Some customers care most about catch area. Others care about whether it’s farmed or wild where applicable. Others simply want a consistent eating result and will choose by cut and format first, then check origin and method as a second filter.
Across the category you may see a mix such as farmed Tuna items, wild Tuna items where stocked, and a range of formats including fillets and portions, steaks, larger cuts, and speciality lines like smoked or cured products. Method informs texture. Cut informs cooking. Origin informs preference. Pack format informs planning. The point is not to tell you what to value — it’s to show you the information clearly so you can decide.
If an item carries specific sourcing notes, fishing method, or additional provenance detail, it will be stated on that product’s page rather than implied at category level. That keeps the language clean, the expectations accurate, and the choice genuinely yours — based on what’s evidenced on the SKU you’re putting in your basket.
Frequently Asked Questions
Is frozen hake as good as fresh?
“Fresh” and “frozen” aren’t really opposites — they’re two different ways of managing time and handling. When people say “fresh”, they usually mean “recent”, but a fresh fillet can still spend days moving through a supply chain, sitting on ice, being handled, and slowly changing as the hours add up. Frozen is different: it’s about locking in a point in time, then keeping it there until you’re ready to cook.
Quality comes down to the details. Freezing can affect texture if the fish is mishandled — temperature swings, lots of air exposure, or poor packaging can lead to dryness, dull flavour, and that slightly “watery” feel once it thaws. Done properly, frozen hake stays clean-tasting and properly flaky. Good packaging reduces air contact and helps protect the surface; good defrosting (slow in the fridge, kept contained, then patted dry) keeps moisture where you want it: inside the fish, not leaking out as drip loss.
That’s why we focus on control. Our frozen hake is processed and frozen within hours, and it’s shipped the way frozen food should be shipped: packed with dry ice in insulated packaging designed to keep it frozen, then dispatched by DPD overnight courier. The goal is simple — keep your hake in the same condition it left us, so your cooking results don’t depend on luck.
If you’re deciding what to buy, match the cut to the job. Portions are the midweek workhorse: predictable size, fast cooking, less waste. Steaks are the grilling and high-heat option: they hold their shape and tolerate a hotter pan or grill better than thinner fillets. For entertaining, go bigger — a large fillet or whole side gives you cleaner presentation, easier batch prep, and the option to slice your own portions the way you like.
Fresh can be brilliant when it’s truly fresh and handled well — but frozen makes “handled well” much easier to guarantee. If you want predictable results, frozen is the easier way to make Hake a routine.
How do I defrost frozen hake without it going watery?
“Watery” hake is usually drip loss you didn’t mean to create. When fish freezes, water inside the flesh forms ice crystals. If the freeze–thaw cycle is gentle and stable, those crystals stay small and the texture holds up. If it’s warmed too quickly (or warmed, re-frozen, then thawed again), crystals grow, cell structure gets stressed, and more moisture leaks out as the fish defrosts. Add a too-warm kitchen counter defrost and you get the worst combo: soft texture + puddle on the plate.
The fix is simple: treat defrosting like part of cooking.
The best-practice flow is: defrost in the fridge, keep it contained, keep the packaging intact if it’s vac packed, pat dry, then cook. The fridge gives you slow, even thawing. Keeping it contained (tray, bowl, or lidded container) manages the drip so it doesn’t sit under the fish and turn the surface soggy. If the hake is vacuum packed, leaving it sealed helps limit air exposure and reduces the chance of the surface drying out or picking up fridge smells. Once it’s thawed, take it out, pat dry with kitchen paper, and let the surface breathe for a moment before the pan or oven. Dry surface equals better sear; gentle heat protects flake.
A few cut-specific tips help:
- Portions are easiest: they’re portionable, consistent in thickness, and they thaw evenly. They also give you the best “predictable texture” for midweek cooking.
- Thick fillets / large pieces need more patience: keep them supported (on a tray) so the thawed outer layer isn’t sitting in its own drip loss while the centre catches up. Don’t rush them with warmth unless you’re cooking immediately.
- Steaks behave differently: they’re thicker and hold shape well, so they often feel less fragile — but they still benefit from a contained fridge thaw and a proper pat dry, especially around the edges and central bone area.
If you’re short on time, cooking from frozen can work as a backup (especially for portions), but the method matters — think gentler heat and a little longer to drive off surface moisture without overcooking the centre. That’s a separate topic for a reason.
Good defrosting is texture control.
Wild vs farmed hake — what should I choose?
Both wild and farmed hake can be excellent — the better choice usually depends on what you like and how you plan to cook it, not on a simple “good vs bad” label. Think of it like choosing tomatoes: some are punchy and uneven but memorable, others are tidy and reliable. Neither is wrong; they just suit different plates.
Typical differences (in real-world, kitchen terms):
- Flavour intensity: Wild hake may have a slightly more pronounced “sea” flavour, while farmed hake can taste a bit milder. That said, flavour varies by species and handling, so it’s best treated as a tendency, not a rule.
- Firmness and flake: Wild fish often may feel a touch firmer with a clean flake, while farmed fish may be a little softer. Again, the cut matters: a thick hake fillet will behave differently than smaller portions.
- Fat level and forgiveness: Some farmed fish may carry a little more fat, which can make it more forgiving under higher heat. Leaner fish (often associated with many wild-caught white fish) tends to reward gentler cooking and moisture-friendly techniques.
- Consistency: Farmed fish is typically associated with more consistent sizing and supply, which can help if you want repeatable results week to week.
- Price: Prices can differ — wild fish is often priced higher in many markets, but it varies by origin, season, and SKU.
On frozenfish.direct, the practical way to handle this is simple: the product details tell you whether a hake item is wild or farmed, and they show where it comes from. That lets you choose at SKU level, rather than guessing from a category-wide claim. The range may include wild hake items, farmed hake items, and different cuts like hake fillets, so you can match fish to the job.
Pairing guidance that actually helps at the hob:
- Leaner hake benefits from gentler cooking and a little help: butter-based finishes, olive oil, pan juices, or a light sauce. It also likes being pulled off the heat a touch early and rested briefly so it stays juicy.
- Fattier, more forgiving hake (where applicable) tends to be happier with higher heat: pan-frying, grilling, or a stronger sear, because the extra richness helps protect texture and flavour under stress.
The buyer’s shortcut is the one that keeps you sane: Choose by cooking method first, then by origin and method.
Which hake cut should I buy for my plan?
Choosing the right hake cut is mostly about getting the result you want with the least friction. Instead of starting with “what’s the best?”, start with your plan — then pick the cut that makes that plan easy.
Weeknight meals (fast, low-drama): go for portions or skinless fillets.
Portions are the neatest option when you want predictable cooking and tidy plating. They’re usually more uniform in thickness, which helps you avoid the classic problem of one end perfect and the other end overdone. Skinless fillets give you flexibility — oven, pan, tray-bake — without needing to think about crisping skin.
Grilling (high heat, robust handling): choose steaks, or skin-on where available.
Hake steaks hold their shape better on a grill or in a hot pan because the cut has more structure. If you like a bit of texture contrast, skin-on pieces can deliver that satisfying crisp edge — and the skin also acts like a natural “buffer” against aggressive heat.
Entertaining (impressive, slice-and-serve): whole side or a large fillet.
A whole side/large fillet is your “centre-of-table” cut. It roasts well, slices cleanly, and lets you serve generous portions without juggling multiple small pieces. It’s also ideal if you want to portion it yourself for batch prep.
Prep-it-yourself (maximum control): whole gutted hake.
Whole fish is for people who want the full control panel — trimming, slicing, roasting, or breaking it down into fillets and portions at home. It’s a bit more work, but it rewards you with flexibility and a proper fishmonger feel.
Special occasions (ready-for-a-specific-use): smoked/cured lines.
If stocked, smoked or cured hake is about convenience for a particular moment — less “how do I cook this?” and more “how do I serve it well?”
Two things drive outcomes more than anything else: thickness and skin. Thickness affects how forgiving the fish is and how evenly it cooks; skin affects texture, crispness, and how confidently you can push heat.
If you only buy one thing: start with portions. They’re the most predictable for timing, waste control, and repeatable results — especially if you’re building hake into your weekly rotation.
Pick the cut that matches your heat source and your timing.
Can I cook hake from frozen?
Yes, often you can — but method matters.
Cooking hake straight from frozen works best when you treat it like a moisture and thickness problem, not a “quick sear” problem. Frozen fish carries surface ice and extra moisture as it warms, and that changes how it behaves in a pan. A direct high-heat sear needs a dry surface to brown properly; if the outside is steaming, you’ll get pale patches and a softer finish. Thickness matters too: the thicker the piece, the harder it is to heat the centre gently without overworking the outside.
The most forgiving approaches are frozen-to-oven, air-fryer, or a covered pan method, because they let you bring the fish up to temperature more evenly before you ask for colour. Here’s a practical flow in plain terms: remove all outer packaging first. If there’s loose surface ice, give the fish a quick rinse just to clear it, then pat dry thoroughly with kitchen paper. Start with gentler heat to get the inside moving in the right direction, then finish hotter to tighten the surface and add a little colour. In an oven or air-fryer, that usually means beginning with a more moderate setting and then boosting heat near the end; in a pan, it can mean starting with a covered, lower-heat cook and uncovering to finish. Follow any on-pack guidance and always adjust to the thickness of your fillet, portion, or steak.
When is cooking from frozen not the best call? If you’ve got a very thick piece and you’re chasing a perfect restaurant-style sear, defrosting first will give you a drier surface and more control. Also, speciality products (cured, smoked, or sashimi-style cuts if stocked) should be handled exactly as the product details specify — they’re made for specific uses and don’t follow the same “cook it through” playbook.
Done right, you’ll still get clean flake, a moist centre, and less weeknight faff. Frozen-to-oven is the weeknight cheat code when you need Hake now.
How long does frozen hake last, and how do I avoid freezer burn?
Frozen hake can last a long time in the freezer, but there are two different clocks running: safety and quality. From a food safety point of view, properly frozen fish stays safe for a very long time as long as it remains frozen and is handled cleanly after opening. Quality is the part that slowly drifts — texture can dry out, flavours can flatten, and the fish can lose that “clean, juicy flake” you’re buying it for. That’s why it’s better to think in terms of best eating rather than a dramatic “use by” countdown, and to rely on the on-pack storage guidance for the most accurate, product-specific direction.
The main quality killer is freezer burn. Despite the name, it isn’t heat damage — it’s dehydration caused by air exposure. When cold, dry freezer air reaches the surface of the fish, moisture migrates out of the flesh and forms ice crystals elsewhere in the pack. What you’ll notice is pretty distinct: dry or pale patches, a duller colour, and a more tough, cottony texture after cooking. It’s not usually dangerous, but it is disappointing — and hake, being a relatively lean, delicate fish, can feel the dryness faster than fattier species.
The good news is that freezer burn is mostly preventable with boring, reliable habits:
Keep packs sealed until you need them, and once opened, minimise air exposure immediately — re-wrap tightly, press out air, and get it back into the freezer. Store fish flat where you can: it freezes and re-chills more evenly, and it’s less likely to get crushed and leak. Rotate stock by bringing older packs to the front so they’re used first. Keep your freezer steady: frequent door-opening and temperature swings encourage ice crystals and moisture movement, which nudges texture in the wrong direction.
This is also where packaging matters. Many frozenfish.direct hake lines are vacuum packed, which helps because it reduces the amount of air sitting against the fish — less air means less dehydration risk. It’s still worth handling opened packs carefully, but good vacuum sealing gives you a head start.
Good packaging and steady cold are what keep Hake tasting like Hake.