Why Buy Frozen Sushi Essentials?
Frozen works for sushi essentials for the same reason it works for fillets: it gives you control. Instead of gambling on what’s “fresh” today, you’re buying a product that’s been locked at a specific point in time, in a pack size you can plan around. That means fewer last-minute substitutions, less waste, and the same result every time you restock.
On frozenfish.direct we’re careful about how we describe that “locked-in” moment: our site states that our fish is filleted, packed and frozen within 3 hours of being caught. It also notes that “fresh” fish—unless you’ve literally watched it come out of the water—is commonly 3 to 12 days old by the time you’re buying it. (Frozen Fish Direct) Those numbers aren’t there to knock fresh counters; they’re there to show what time does in a supply chain, and why freezing can be a quality-control advantage.
Freezing slows spoilage. Cold storage protects texture. Vacuum packs reduce air exposure. Portions reduce waste. Consistent weights improve cooking.
Another practical win is predictability. Frozen stock is easy to hold, easy to portion, and easier to reorder because your “baseline” doesn’t change every day with the market. When packaging is tight and cold stays steady, flavour stays clean and texture stays closer to how it was when it was packed.
For sushi essentials specifically, consistency is the superpower. Whether you’re stocking sushi prawns, nori, rice, ginger, or a kit for a first-time roll, frozen and shelf-stable staples let you build the same basket week after week. You can use what you need, keep the rest sealed, and plan your next sushi night without rushing to use everything immediately.
In short: frozen makes your buying decisions simpler. You choose by product type, pack size, and how often you’ll use it—then you repeat a system that works.
Choose Your Sushi Essentials
Versatile favourites for quick midweek
If you want sushi nights to feel routine (not a special project), start with the versatile essentials that work across formats. Think nori sheets, sushi rice, rice vinegar seasoning, kewpie-style mayo, wasabi, and pickled ginger—the core building blocks that let you go from maki rolls to rice bowls without changing your shopping habits. These are the staples that suit a quick midweek rhythm because they’re easy to portion, easy to repeat, and flexible when you’re using the oven or a pan for cooked toppings. Add panko or a crunchy topper and you’ve got a fast route to texture without overcomplicating the prep.
Portions built for speed and predictable sizing
Portion-friendly items are for people who want control: consistent results, predictable sizing, and less waste. Pre-measured packs make it easier to plan servings—especially when you’re doing a mixed spread with sushi rolls, nigiri-style bites, and sides. Portion control also means you can dial in your “standard” basket: the same weight bands, the same usage, the same timing. For households that do sushi regularly, this is the difference between “we should make sushi sometime” and “we’ve got this sorted.”
Holds its shape on grill or pan, tolerates high heat
Some sushi essentials are chosen for performance under heat: they hold their shape, don’t fall apart when handled, and have a higher tolerance for high temperatures. These are the smart picks if your sushi night includes cooked elements like seared toppings, crispy edges, or pan-finished bites. You’re aiming for clean handling and reliable texture—especially when you’re working with nigiri builds, temaki (hand rolls), or toppings that need quick, confident contact with heat. The goal is controlled browning, not guesswork.
Entertaining, smoking, batch prep, slicing your own portions
If you’re cooking for guests, batch prep matters. Bigger packs and format-flexible items suit entertaining because you can stage everything: prep rice, set out nori, portion fillings, and build to order. This is also where “slice your own portions” thinking pays off—more control over thickness, presentation, and pacing. It’s ideal for platters, sharing boards, and sushi spreads where you want a mix of uramaki (inside-out rolls), hosomaki (thin rolls), and topped bites without running out halfway through.
For people who want to prep everything themselves
Some customers want the ingredients, not the shortcuts. If that’s you, choose essentials that are ready for specific uses—tobiko for garnish and pop, masago as a milder roe option, nori graded for rolling, and seasonings that keep flavour consistent across batches. Keep it simple: buy the formats that match how you actually build sushi at home, then repeat what works.
Pick the Sushi Essentials that matches your pan, your timing, and your appetite.
What Arrives at Your Door
Sushi nights shouldn’t come with delivery anxiety. Your order is dispatched by DPD overnight courier, and it’s packed like it actually matters what temperature your seafood is when it reaches you. Each shipment is packed with dry ice in a polystyrene insulated box, which helps keep fish frozen during transit by slowing down heat gain from the outside world. In plain terms: insulation reduces temperature swings, and dry ice provides cold “headroom” so the box stays in the right zone even when your parcel is moving through depots and vans.
The delivery promise is built around a simple cold-chain habit: keep the product frozen until it reaches your freezer. Orders placed before the stated cut-off are prepared for next working day delivery on eligible days, and the safest way to describe timing is the accurate way—checkout controls valid delivery dates, so you only select delivery options that can be supported for your address and the day you’re ordering. That keeps expectations realistic and reduces those “where is it?” support tickets before they’re born.
When the box arrives, treat it like you’ve just received something time-sensitive (because you have): open it promptly, check the packs, and move everything straight to the freezer. Keep the handling simple and follow the on-pack storage guidance for the best results—especially for sushi essentials where texture matters and repeatability is the whole point. You may notice the chill and a little vapour when opening; that’s normal with dry ice packaging doing its job.
Dry ice safety is straightforward and doesn’t need drama: avoid direct skin contact, keep the area ventilated, and don’t seal dry ice into an airtight container. Keep it away from children and pets, and let any remaining dry ice naturally dissipate in a well-ventilated space. The box is engineered to protect your order; your job is just the last step—get it into the freezer quickly and you’re sorted.
Label-First Transparency
Buying sushi essentials online is only stressful when the details are fuzzy. That’s why each item is set up with the practical fields you actually use to make a decision, not vague fluff. On every product you’ll see the core buying signals up front: the cut, the weight or pack size, and the handling details that change how it behaves in the kitchen. Where it’s relevant to the item, we’ll show whether it’s shell-on or shell-off, skin-on or skinless, and boneless or pin-boned—because those aren’t trivia, they’re the difference between “easy midweek” and “needs a bit of prep”.
You’ll also see whether the seafood is wild or farmed where applicable, so you can choose based on your preference and your planned use. And when origin or catch area varies by item, we keep it clean and honest: it’s shown on the product details, not turned into a category-wide claim. The point is simple—shop with your eyes, not hope.
For products that include ingredients beyond the fish (think cured, smoked, or seasoned essentials), you’ll find ingredients listed clearly so you know exactly what you’re getting. Allergens are clearly flagged across the sushi essentials range as well, so you can make a safe choice for your table without digging through guesswork.
- Cut drives cooking. Weight drives timing. Skin drives texture.
- Shell changes prep. Bones change eating. Portions change planning.
- Origin informs preference. Method informs fat level. Pack size informs value.
- Details prevent surprises. Clear labels reduce waste. Specifics build confidence.
This is what “label-first” means in practice: the information you need to buy well, shown in the place you expect to find it—right on the product.
Storage and Defrosting
Frozen sushi essentials are at their best when you treat them like a good ingredient, not an emergency. The aim is simple: keep them properly frozen until you need them, and keep air exposure to a minimum so the texture stays clean and the flavour stays tight. Most items arrive vac packed, which already helps—air is the enemy of quality because it pulls moisture out and invites freezer burn. Once a pack is opened, reseal it well (or portion it and rewrap) so the surface doesn’t dry out and turn dull or “fridgey” after cooking.
A small habit that pays off: rotate stock. Newer packs go to the back, older packs forward, so nothing gets forgotten at the bottom of the freezer. Frozen fish is wonderfully portionable, but only if you keep it organised—your future self will thank you.
For defrosting, the calm, reliable default is fridge defrost. Keep the fish contained as it thaws—still sealed if possible, or in a covered dish—so it stays protected and you can manage any drip loss without making a mess. Drip loss is normal: ice crystals melt, a bit of moisture comes out, and that can be the difference between a clean sear and something that turns watery in the pan. When it’s ready to cook, open the pack and pat dry thoroughly. Dry surface equals better browning; it also helps the flesh hold its firmness instead of going soft and pale.
Texture-wise, different cuts behave differently. Leaner pieces can flake beautifully when treated gently, while fatty cuts forgive heat and stay more forgiving if your pan runs hot. If you’re working with skin-on items, drying the skin properly is what helps it crisp instead of steaming. If something is pin-boned, it’ll be noted on the product details—check before you start, so prep stays smooth.
On refreezing: keep it conservative. If you’ve thawed something fully, especially if it’s been opened, don’t refreeze unless the on-pack guidance says it’s suitable. When in doubt, don’t refreeze—use it, cook it, and move on. That one rule prevents most “why is this soft?” disappointments later.
Cooking Outcomes
Frozen Sushi Essentials isn’t one single “cook it like this” product — it’s a toolkit: Sushi Rice, Sushi Nori, Sushi Ginger, Sushi Ebi, Sushi Maki Sticks, and Sushi Kits (availability varies by what’s in stock). The trick is to treat each piece like its own job, because they have different handling expectations; follow product details.
Rice cooker or hob
Aim for grains that look plump and glossy, stick together when pressed, but still feel separate when you bite. Rinse until the water runs clearer, then cook by your usual method (rice cooker or pan) and let it rest off the heat so the centre finishes evenly. When you season and cool it, you’re chasing a texture that feels springy and cohesive — not wet and claggy. If it looks dull and breaks apart, it’s under-hydrated; if it turns paste-like, it’s over-hydrated or over-stirred.
Quick sear/torch option
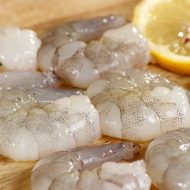
Sushi Ebi is all about clean texture: firmness with a gentle bounce, not rubber. Once it’s ready to use per the pack, keep it tidy and dry so it sits neatly on rice and doesn’t weep into the grain. If you like an “aburi” finish, use brief high heat (torch or fast pan-kiss) only to warm and perfume the surface — stop as soon as you smell a light, sweet prawn aroma and the surface looks lightly tightened. Dry surface, hot pan, leave it alone, finish gently. Gentle finish protects moisture.
Pan-crisp or cold-prep
For rolls, your enemy is smear. Cut fillings cleanly, keep them as dry as practical, and build rolls promptly so moisture doesn’t soften the nori. If you’re crisping any element (a quick pan touch for colour, or a warm filling), chase light browning at the edges while the centre is just warmed through — then stop. Dry surface equals better sear. Gentle finish protects moisture. Resting evens temperature. Thickness changes timing. Fat content changes forgiveness.
Nori + ginger
Nori should feel crisp and snappy, never leathery. Keep sheets dry, and if you want extra aroma, give them a few seconds of gentle heat just until the seaweed smell lifts — too long and you tip into bitterness. Build rolls soon after toasting so the sheet stays crackly, and use sushi ginger as your reset button between bites: clean, sharp, palate-ready. For kits, follow the included method, then use these same cues: crisp nori, glossy rice, clean cuts.
Nutrition Snapshot
Sushi essentials can be an easy way to keep your freezer stocked with ingredients that feel “special”, without needing a special occasion. Nutritionally, most seafood-based essentials are valued for being a straightforward source of protein, with a mix of naturally occurring vitamins and minerals that vary by species and format. White fish tends to be leaner, while richer fish and oily cuts naturally carry more fat—often the same quality that gives a fuller mouthfeel and a more forgiving cook.
What matters is that nutrients vary by species, cut, and whether it’s wild or farmed; see product details for the specific item you’re buying. That’s also where you’ll find practical information that can affect what ends up on your plate: pack size, whether it’s skin-on or skinless, boneless or pin-boned where relevant, and any ingredients for cured or prepared items. If you’re choosing between two similar products, those fields are more useful than vague “good for you” claims, because they tell you how it will portion, cook, and serve.
From a cooking point of view, fat content and texture are part of the story. Leaner pieces can dry out faster if pushed too hard, while fattier cuts tend to stay softer and moister with the same heat. That isn’t a health promise—it’s just how the ingredient behaves in a pan, oven, or grill.
Like any food, sushi essentials work best as part of a balanced diet, alongside vegetables, grains, and whatever else fits your routine. Pick the item that matches your taste, your cooking style, and your portion needs, and you’ll get predictable results without the noise.
Provenance and Responsible Sourcing
Buying sushi essentials shouldn’t require guesswork. Our approach is simple: we show method and origin details per product so you can choose what fits your preferences. That means you’re not asked to trust broad, category-wide claims—because the reality is that different products can come from different fisheries, farms, and regions, and those details matter if you’re selecting by taste, cooking style, or personal buying standards.
On each SKU, you’ll typically see the information that helps you make a grounded decision: whether it’s wild or farmed where applicable, what the production method is when it’s relevant to the product type, and the origin/catch area shown on the product details when it varies item to item. For prepared or cured lines, you’ll also see ingredients and clear allergen flags, so you can choose with confidence—especially if you’re stocking up for family meals or serving guests.
This category can cover a broad mix depending on what’s in stock: everyday freezer staples that support quick midweek prep, alongside speciality lines for more specific uses. Some items are “build-your-own” essentials, chosen for clean portioning and flexible prep; others are designed to be ready for particular outcomes. The key is that any provenance or sourcing-related detail is treated as SKU-level, not a sweeping promise applied to everything.
Provenance supports preference. Clear labels support trust. Evidence supports claims. If you care about a specific origin, method, or format, the product details are where the decision becomes real—and where your preferences can actually be honoured.
Frequently Asked Questions
Is frozen sushi essentials as good as fresh?
“Is frozen Sushi Essentials as good as fresh?” is one of those questions that sounds simple until you look closely at what “fresh” actually means. In practice, freshness is about time and handling: how quickly the product was processed, how cold it stayed, and how many hours (or days) it spent moving through the supply chain. Frozen, on the other hand, is about locking in a point in time—taking seafood at a good moment and preserving it so that moment doesn’t keep ticking away on the counter, in a van, or in a display fridge.
Can frozen match fresh for texture and flavour? Often, yes—when it’s handled well. Freezing can affect moisture if it’s done poorly or if the product is thawed roughly. That’s when people complain about fish turning watery or soft, or losing that clean bite. But good packaging and a sensible defrost protect quality: tight packs reduce air exposure, steady cold limits damage, and gentle fridge thawing reduces drip loss. The goal isn’t “magic frozen fish.” It’s controlled conditions from freeze to pan.
That’s also why the cold chain matters as much as the fish itself. With frozenfish.direct, the model is built around consistency: seafood is processed and frozen within hours, then shipped in polystyrene insulated packaging with dry ice, designed to help it stay frozen on arrival. That combination—fast processing + stable cold—makes frozen less of a compromise and more of a repeatable standard.
The best choice depends on what you’re doing:
- Midweek portions: Frozen wins for convenience and predictability. You can pull what you need, keep the rest sealed, and plan meals without waste.
- Grilling and high-heat cooking: Frozen is a strong option because portionable cuts and consistent sizing make timing easier—especially when you want reliable results.
- Entertaining: Frozen shines when you need control. You can buy ahead, keep stock ready, and serve with confidence instead of gambling on “fresh” availability.
Fresh can be fantastic. Frozen can be fantastic too—just in a different way. If you want predictable results, frozen is the easier way to make Sushi Essentials a routine.
How do I defrost frozen sushi essentials without it going watery?
“Watery” fish is almost never a mystery ingredient problem — it’s a physics + handling problem. When seafood freezes, water inside the flesh forms ice crystals. If the freeze/thaw is rough (or the product warms up too quickly), those crystals can damage cell structure. Once you defrost, that damaged structure can’t hold moisture as well, so you get drip loss: liquid leaking out instead of staying in the fillet. The other usual culprits are too-warm defrosting (countertop or warm water), and repeated thaw/refreeze cycles, which compound moisture loss and leave texture soft and uneven.
The best way to keep Sushi Essentials from going watery is to treat defrosting like texture management, not like “getting it unfrozen fast.” Start with the fridge as your default. Keep the fish contained (a tray or bowl underneath) so any meltwater doesn’t sit against the flesh. If it’s vacuum packed, it’s usually best to keep the packaging intact while it thaws, because that limits air exposure and helps the surface stay clean and firm — follow the on-pack guidance if a product specifies a different method. Once defrosted, open, drain, and pat dry with kitchen paper. That last step is not cosmetic: a dry surface helps the fish hold its shape and cook cleanly, instead of steaming in its own moisture.
Cut makes a difference. Portions are the easiest to get right because they defrost more evenly and you can stop at “just thawed” without the edges turning soft. Thick fillets need more patience — rushing them tends to thaw the outside while the centre stays icy, and that’s when people over-handle the fish and squeeze out moisture. Let the fridge do the work and avoid “checking” it every 10 minutes. Steaks (cross-cut pieces) often behave differently because they’re thicker and more uniform; they can hold shape well, but they still need slow, contained thawing so the outer ring doesn’t turn wet before the middle catches up.
If you’re short on time, cooking from frozen can be a decent backup for some items — it’s a different technique (and not ideal for every cut), so treat it as Plan B and follow the product details.
Good defrosting is texture control.
Which sushi essentials should I buy for my plan?
It helps to start with the plan, not the product. Sushi Essentials covers a wide spread of cuts and pack styles, and the “best” one is the one that fits your timing, your confidence level, and how much you want to do yourself.
For weeknight meals, go straight to portions. They’re quick to handle, easy to portion-control, and the sizing is predictable — which means your pan timing is predictable too. Portions are the no-drama option when you’re cooking between school runs, meetings, or whatever chaos the universe scheduled for you. You get consistent results without needing to trim, pin-bone, or guess how much to serve.
For entertaining, think in larger, better-presenting cuts. Fillets and “slice-your-own” packs suit sharing plates, mixed platters, and that moment where you want the food to look intentional. Bigger cuts also let you control the finish — you can portion at the last minute, serve thicker slices for a more luxurious bite, or keep it neat and uniform if you’re plating. It’s the easiest way to make the table feel upgraded without turning your kitchen into a stress laboratory.
For prep-it-yourself cooking, choose whole Sushi Essentials (or the most “natural” untrimmed options in the range). This is for people who like control: you can portion exactly how you want, keep trimmings for stock, and decide whether you want skin-on, skinless, pin-boned, or left as-is depending on the dish. It’s more work, but it’s also more flexible — especially if you batch prep or cook in different styles across the week.
For special occasions, pick the cut that buys you the most confidence: often that’s a premium-looking centre-cut, a thicker piece that holds its shape, or a “best-of” style selection that suits careful slicing and clean presentation. Special occasions are not the time to gamble on fiddly prep if you’re already juggling sides, timings, and guests.
If you only buy one thing, make it portions. They’re the most versatile, the easiest to store and use, and they give you repeatable results across pan, oven, and grill without needing extra prep skill.
You don’t need to overthink it — match the cut to the job, then follow the product details for the specifics.
Pick the cut that matches your heat source and your timing.
Can I cook sushi essentials from frozen?
Yes, often you can — but method matters.
Cooking Sushi Essentials straight from frozen works best when you treat it like a moisture-management problem first, and a sear problem second. From frozen, the surface can carry a thin layer of ice and extra moisture, and that’s the enemy of good browning. Moisture cools the pan, steams the surface, and makes the outside go pale before the inside is ready. Thickness matters too: thin portions warm through quickly, while thicker pieces can end up “dark outside, cold middle” if you rush them on high heat.
Start by removing all packaging. If there’s visible surface ice or frost, give it a quick rinse to knock that off, then pat it properly dry with kitchen paper. Dry surface equals better sear. After that, use a gentler first phase to bring the centre up evenly, then finish hotter to build colour and texture. An oven, air-fryer, or a covered pan is often more forgiving than going straight into a ripping-hot open-pan sear, because the enclosed heat helps the middle catch up without you scorching the outside. Covered heat protects moisture. Finishing heat builds colour.
If you’re using a pan, think “controlled start, confident finish”. Let it cook through most of the way at a moderate pace, then uncover and turn the heat up briefly at the end to firm the surface and sharpen the edges. If you’re using an oven or air-fryer, the same logic applies: steady heat first, then a short hotter finish if the product and cut suit it. Always adjust to thickness, and follow the on-pack guidance where it differs by species or cut.
There are a couple of times you shouldn’t do frozen-to-cook. Very thick pieces are the big one if you want a perfect, restaurant-style sear; defrosting first gives you better control over doneness and surface dryness. Also, speciality cured-style products should follow the product guidance rather than improvised cooking, because their handling expectations can be different.
Frozen-to-oven is the weeknight cheat code when you need Sushi Essentials now.
How long does frozen sushi essentials last, and how do I avoid freezer burn?
Frozen Sushi Essentials will usually stay safe in the freezer for a long time, but the eating quality can slowly drop off if storage isn’t kind to it. That’s the key distinction: freezing is brilliant for food safety because very cold temperatures stop bacteria from growing, but it can’t stop texture and flavour changes caused by air exposure, temperature swings, and time. So the best mindset is: safety lasts longer than peak quality, and your job is to protect quality.
The main enemy is freezer burn. Despite the dramatic name, it isn’t “burning” — it’s dehydration. When cold, dry freezer air gets to the food surface, moisture migrates out and can sublimate (go from ice straight to vapour). Oxygen can also creep in and dull the flavour over time. You’ll spot freezer burn as dry or rough patches, a dull, greyed colour, and sometimes a slightly fibrous or tough bite once cooked. It’s not usually dangerous, but it’s disappointing — especially on delicate cuts where texture is the whole point.
Avoiding it is mostly boring freezer discipline (the best kind of discipline, because it works):
Keep packs sealed. Don’t “just fold it over” and hope. If you open a pack and don’t use it all, rewrap tightly or move portions into an airtight freezer bag, squeezing out as much air as possible.
Minimise air exposure. Air is what dries the surface. The less air around the fish, the better the texture holds.
Store flat where you can. Flat packs freeze and re-freeze more evenly, stack better, and are less likely to get crushed or partially thawed during freezer rummaging.
Rotate your stock. Put newer packs behind older packs so you naturally use the older ones first. That keeps you closer to the product’s best eating window without needing to remember dates like a laboratory technician.
Keep the freezer stable. Frequent door opening, overstuffing, or a freezer that struggles to hold temperature causes tiny thaw/refreeze cycles that worsen drip loss and texture. Steady cold protects firmness.
This is also where your packaging matters. Many frozenfish.direct products are vacuum packed, which helps reduce air exposure and slows dehydration — one of the simplest, most effective defences against freezer burn.
For “how long,” use the on-pack storage guidance as your anchor, and treat everything else as general common-sense: the better the seal and the steadier the cold, the longer it tastes like it should.
Good packaging and steady cold are what keep Sushi Essentials tasting like Sushi Essentials.