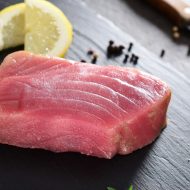
Why Buy Frozen Whiting?
Frozen Whiting is one of those products that gets easier—not worse—when it’s handled properly as frozen. The big win is control: you can buy the cut and weight you actually need, keep it on hand, and cook with the same results week after week. That matters if you’re feeding a family, stocking a holiday freezer, or just trying to stop “what’s for dinner?” becoming a daily negotiation.
Frozen also reduces the hidden losses that come with “fresh” shopping. You’re not racing the clock, you’re not binning unused portions, and you’re not forced into last-minute substitutions because the counter didn’t have your preferred size. With Whiting in the freezer, planning becomes boringly reliable—in the best way.
On frozenfish.direct, we’re careful about how we talk about quality: freezing isn’t a magic trick, it’s a timing advantage. “Fresh” can still spend days moving through a supply chain; frozen is about locking in a point-in-time standard and keeping it stable. Across the site, we state that fish is filleted, packed, and frozen within 3 hours of being caught (where that’s the stated spec for the line), which is exactly the kind of detail that makes frozen feel predictable rather than vague.
Freezing slows spoilage. Cold storage protects texture. Portion sizes reduce waste. Consistent weights improve repeatability. Good packaging reduces air exposure.
Source check (for your internal validation, not page copy): The “filleted, packed and frozen within 3 hours of being caught” claim appears on-site in the “Why choose us?” section of the Frozen Fish Fingers page. (frozenfish.direct)
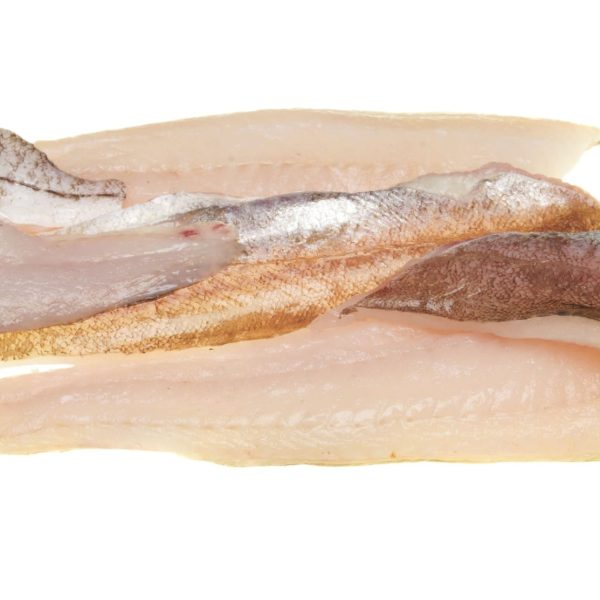
Choose Your Cut
Fillets for quick midweek cooking
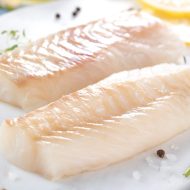
If you want fast, clean results, Whiting fillets are the everyday pick. They’re naturally versatile, work well in the oven or pan, and suit the kind of quick midweek meals where timing matters more than theatre. Fillets are usually skinless, neatly trimmed, and easy to season—think light dusting of flour, a simple herb crumb, or a lemon-butter finish. Because Whiting is a delicate white fish, fillets also suit gentler cooking when you want a soft flake rather than a heavy bite.
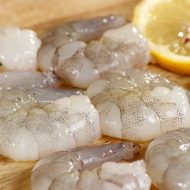
Portions for speed and predictable sizing
Whiting portions are all about control: speed, predictable sizing, and straightforward portion control. When each piece is cut to a consistent weight band, it becomes much easier to plan plates, manage cook times, and avoid over-ordering. Portions are a strong choice for households that want repeatable outcomes—one piece per person, clean servings, minimal fuss—especially when you’re building meals around simple sides and a quick sauce.
Larger cuts that hold shape under higher heat
If you like a firmer feel in the pan, choose thicker pieces that hold their shape. Bigger cuts tend to be more forgiving on higher heat, making them a better match for a proper pan-sear, a hot griddle, or a light brush of oil and spice before you cook. They’re also a sensible option if you prefer a crisp edge and a moist centre—less fragile, more tolerant, and easier to handle when you’re moving pieces in a busy pan.
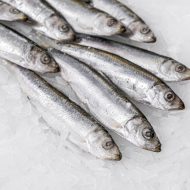
Whole fish for entertaining, smoking, and batch prep
For people who want to prep themselves, whole Whiting is the flexible, make-it-your-own option. It suits entertaining, smoking, batch prep, and anyone who prefers to slice their own portions to match the crowd. Whole fish also gives you more control over presentation and trimming—great if you want to serve a fish that looks like a fish, not just a piece of it. It’s the same Whiting, just with more options in your hands.
Speciality lines for specific uses
If you spot speciality Whiting items, treat them as “ready for specific uses”—pre-trimmed, pre-cut, or prepared to suit a particular outcome, with the details clearly shown on the product listing. The benefit is simple: less prep, clearer expectations, and a format that matches your method.
Pick the Whiting that matches your pan, your timing, and your appetite.
What Arrives at Your Door
Your Whiting is handled like frozen food should be handled: as a cold-chain job, not a cardboard-box job. Dispatched by DPD overnight courier. That means your order moves fast through transit so the product spends less time in “maybe” temperatures and more time where it belongs—properly frozen.
Each parcel is packed with dry ice in a polystyrene insulated box, and that combination is doing real work. The insulation slows down heat getting in, while the dry ice provides a deep-cold buffer that helps keep fish frozen during transit. Dry ice naturally turns from solid to gas (it doesn’t melt into liquid), so it can hold low temperatures for longer than standard ice packs. The result is a delivery setup designed to arrive frozen, not merely “chilled”.
Delivery timing is kept practical and accurate: orders placed before the stated cut-off are prepared for next working day delivery on eligible days, and the checkout process controls the valid delivery dates so you’re not guessing when a frozen box will land. If a date isn’t available at checkout, it’s because it’s not a sensible cold-chain option for that day.
When your box arrives, the first few minutes are simple: open it promptly, check the packs, and move the fish straight into your freezer, then follow the on-pack storage guidance for best results. Dry ice can look a bit dramatic, but it’s easy to handle safely—avoid direct skin contact, keep the area ventilated, don’t seal dry ice into an airtight container, and keep it away from children and pets. After that, it’s just frozen Whiting, properly packed, ready when you are.
Label-First Transparency
Buying fish online only feels risky when the details are fuzzy. On frozenfish.direct, we keep it simple: every Whiting line is built around the practical fields that help you decide quickly and cook with confidence. On each product, you’ll see the cut (so you know what you’re actually getting), the weight or pack size (so portions and value are clear), and—where it applies—whether it’s skin-on or skinless, and boneless or pin-boned. Those aren’t “nice to have” specs; they’re the difference between a midweek pan-fry and a tray-bake that feeds everyone without surprises.
You’ll also see whether a Whiting product is wild or farmed where applicable. Some details, like origin and catch area, can vary by item and by availability, so we don’t make sweeping category promises. Instead, it’s shown on the product details for the specific Whiting you’re buying, so you can choose based on your preferences and your standards.
Allergen information is handled the same way: Whiting is clearly flagged as fish, and if you’re choosing cured, smoked, or seasoned products, the ingredients are listed on the relevant product page so you can spot what’s added and what isn’t.
Cut drives cooking. Weight drives timing. Skin drives texture. Bones drive prep time. Origin informs preference. Method informs fat level. Pack size informs value.
Storage and Defrosting
Frozen Whiting is at its best when you treat it like a controlled ingredient, not a panic purchase. Start with the obvious-but-important: keep it frozen until you need it, and protect it from air exposure. Most lines arrive vac packed, which already helps, but once a pack is opened, re-wrap tightly or move portions into an airtight freezer bag with as little trapped air as possible. Air is what drives freezer burn—those dry, pale patches and that slightly “stale” freezer taste. A simple habit that pays off: rotate stock. Put new packs behind older ones so the “older packs forward” rule happens without thinking.
When it’s time to cook, texture is mostly decided by how you defrost. The default best option is fridge defrosting: slow, steady, and kind to the flesh. Keep the fish contained (tray, bowl, or a lidded container) so any drip loss doesn’t wander across your fridge. If the Whiting is skin-on, keep the skin protected and avoid rubbing it around—skin turns crisp when it’s intact and dry. If a product is pin-boned, defrosting in the fridge also makes handling calmer because the flesh stays firmer while you prep.
Whatever your method, the most underrated step is this: pat dry before cooking. Surface moisture is the fast route to “watery” and “soft,” and it’s the enemy of browning. Patting dry helps Whiting hold its shape, improves contact with the pan, and gives you a cleaner flake when it’s done. Whiting is generally lean, so it can feel less forgiving than fatty cuts—fatty fish forgive heat; lean fish rewards gentle control.
On refreezing, keep it conservative. If you’ve defrosted Whiting in the fridge and it stayed properly chilled and contained, some products may be suitable to refreeze—but follow on-pack guidance, and if there’s any doubt about how it was handled, don’t refreeze. The goal isn’t rules for rules’ sake; it’s keeping that clean firmness and sweet, simple flavour right where it should be.
Cooking Outcomes
Crisp skin, pan-first finish
Start with a dry surface and a properly hot pan—this is where crisp skin is earned, not wished for. Lay the Whiting in skin-side down and leave it alone until the skin looks flatter, deeper in colour, and releases more easily; if it’s sticking hard, it usually isn’t ready. Keep the heat confident at the start, then finish gently so the centre stays moist rather than turning chalky. You’re looking for flesh that turns opaque from the edges inward and flakes cleanly with a fork, while the skin stays audibly crisp. Dry surface equals better sear. Gentle finish protects moisture. Resting evens temperature.
Portion control, juicy centre
Portions reward calm cooking: use gentle heat once the pan is hot, and resist the temptation to “just give it another minute.” Whiting can go from juicy to dry fast, so watch for the moment it becomes opaque and the thickest part starts to separate into clean flakes when pressed. If you’re cooking smaller pieces, shorten the sear and let carryover heat do the final work, then rest briefly on a warm plate so the moisture settles back into the flesh. The best cue is texture: springy, tender, and flaking—never rubbery or crumbly. Thickness changes timing. Fat content changes forgiveness. Skin changes crisp.
Oven-ready, steady results
The oven is your friend when you want repeatable outcomes across multiple pieces. Arrange Whiting with a little space so steam can escape, and aim for a finish where the surface looks set, the edges are just starting to colour, and the centre flakes in large, moist pieces. If you’re cooking mixed sizes, pull smaller fillets first and let larger ones finish—timing is driven by thickness, not hope. Oven cooking is also where coatings and crumbed lines can shine, because the heat is even and you’re less likely to break delicate fillets. Think “firm but tender,” not “tight and dry.”
Grill-ready and high-heat tolerance
If you’ve chosen thicker pieces, they’re better suited to higher heat because they hold shape and give you a wider window before overcooking. Make sure the surface is dry, use a hot grill or griddle, and don’t flip constantly—let one side develop colour and structure before turning. Finish over gentler heat or a cooler zone so the centre catches up without the outside turning tough. You’ll know it’s right when the flesh flakes with a clean split and stays glossy, not dusty. For cured/smoked or ready-to-eat Whiting products, handling expectations can be different—follow the product details for the correct method and use-case.
Nutrition Snapshot
Whiting is a lean, mild white fish that fits easily into everyday meals without needing a sales pitch about “superfoods”. In general terms, white fish like Whiting is valued for being a high-protein choice with a lighter fat profile than oily fish, which is one reason it cooks quickly and tastes clean rather than rich. It also naturally contains a spread of micronutrients found in most seafood — but the exact balance depends on what you buy.
A useful reality check for shoppers: nutrients vary by species, cut, and whether it’s wild or farmed, and they can change further if a product is smoked, cured, breaded, or seasoned. That’s why the most accurate place to look is the individual product details and on-pack information for that specific Whiting line. If you’re choosing between portions, fillets, or whole fish, remember that trimming, skin-on vs skinless, and added ingredients (where applicable) can all shift what ends up on your plate.
From a cooking point of view, Whiting’s leaner nature is part of its charm — and its challenge. With less fat to buffer heat, it rewards gentler cooking and a bit of attention to moisture: quick pan work, careful oven roasting, and sauces that protect that tender flake. If you pick skin-on options, you can also get a crisper finish, which adds texture without needing heavy extras. Thicker cuts tend to stay juicier; thinner portions cook faster and can dry out if pushed too hard.
In a balanced diet, Whiting is simply one reliable option in the rotation: straightforward, portionable, and easy to build meals around. The confident choice is the practical one — pick the Whiting cut that matches how you cook, then use the product details to choose the profile that suits you.
Provenance and Responsible Sourcing
With seafood, “responsible” only means something if you can point to what it is, where it came from, and how it was produced. That’s why we keep this simple: we show method and origin details per product so you can choose what fits your preferences. You shouldn’t have to guess whether a pack is wild-caught or farmed, or which waters it came from, or what style of processing it’s had before freezing.
Across our Frozen Whiting range, you may see products that differ by origin, catch/production method, and handling. Some Whiting lines are wild-caught (where stocked), with catch area or origin shown on the product details so you can make an informed choice based on what you personally prefer—UK waters, specific regions, or a particular supply chain. Other items can include farmed Whiting where applicable, again with the production method and origin shown at SKU level rather than as a blanket promise. We also carry speciality lines from time to time—things like pre-portioned cuts or value-led formats that are ready for specific uses—so you can match the product to your kitchen and your standards without relying on marketing language.
What we won’t do is make category-wide claims we can’t prove for every single pack. If a detail varies, it’s treated as a product detail, not a headline. That’s how you keep trust intact.
Provenance supports preference. Clear labels support trust. Evidence supports claims.
Frequently Asked Questions
Is frozen whiting as good as fresh?
“Fresh” and “frozen” aren’t really opposites. Freshness is about time and handling, while frozen is about locking in a point in time—a moment when the fish is in good condition, then held steady until you’re ready to cook it. That’s why the question isn’t “fresh or frozen?” so much as “how well was it handled before it reached me?”
With Whiting, texture and flavour are the real battleground. Freezing can affect moisture if the fish is mishandled—think excess surface ice, temperature swings, or careless thawing that leads to drip loss. That’s where good packaging and good defrosting earn their keep. When Whiting is packed properly (often vacuum packed) and you defrost it gently in the fridge, you keep more of that clean, mild flavour and the delicate flake people buy Whiting for. The simple rule is: steady cold protects quality; rough handling steals it.
At frozenfish.direct, the goal is consistency: seafood is processed and frozen within hours, then shipped in insulated packaging designed to keep it properly frozen. Orders are sent via DPD with dry ice in an insulated box, so what arrives is still in the condition it left us—frozen, stable, and ready for you to store.
How to choose by use-case:
- Midweek portions: go for pre-portioned fillets or smaller packs—quick to plan, easy to cook evenly, minimal waste.
- For grilling or high heat: choose thicker pieces where available; they tolerate heat better and are less likely to dry out.
- For entertaining: larger fillets or bulk packs make sense when you want to portion to size, batch prep, or serve a consistent finish across multiple plates.
If you want predictable results, frozen is the easier way to make Whiting a routine.
How do I defrost frozen whiting without it going watery?
“Watery” Whiting usually isn’t a mystery ingredient problem — it’s a water management problem. When fish freezes, ice crystals form inside the flesh. If the fish is thawed too fast (or gets warm on the outside while the centre is still frozen), those crystals melt and the water escapes as drip loss. Add in repeated thaw/refreeze cycles and you get more cell damage, more liquid in the bag, and a softer, wetter texture in the pan. In short: bigger crystals + rough thaw = more water on your plate and less in the fish.
The best-practice flow is simple and boring — which is exactly why it works. Defrost in the fridge so the temperature stays steady and the melt happens slowly. Keep Whiting contained (on a tray or in a bowl) so any liquid doesn’t sit under the fish. If it’s vac packed, leave the packaging intact while it thaws — it reduces air exposure and helps protect the surface from drying out or picking up fridge smells. Once thawed, open the pack, drain away any liquid, then pat dry thoroughly with kitchen paper before cooking. That last step matters more than people think: a dry surface sears; a wet surface steams.
Cut makes a difference, so adjust your expectations and handling:
- Portions/fillets: easiest to defrost evenly and cook neatly because they’re thinner and more uniform — less risk of a warm outside and icy core.
- Thick fillets: need more patience in the fridge so the centre thaws properly; rushing them is the fast lane to “wet fish”.
- Steaks/cross-cuts: tend to hold more structure but can trap meltwater around the central bone line; drain well and pat dry carefully, especially in the creases.
Two extra texture-savers: keep packs well sealed in the freezer to avoid freezer burn (dehydration that can make edges tough), and once thawed, cook sooner rather than later for the cleanest bite — always following on-pack guidance where provided.
As a backup, some Whiting cuts can be cooked from frozen, but the method changes (you manage surface moisture and timing differently). There’s a separate FAQ for that — the key point here is that proper thawing is still the easiest route to great texture.
Good defrosting is texture control.
Wild vs farmed whiting — what should I choose?
Wild vs farmed Whiting isn’t a “good vs bad” choice — it’s a preference and dish choice. Both can be excellent, and the best pick depends on how you like your fish to eat and how you plan to cook it. Think of it like choosing tomatoes: the label matters, but the recipe matters more.
Here are the typical differences people notice, framed safely because real-world fish varies by species, season, and handling. Farmed Whiting often leans toward consistency — more uniform portion sizes, steadier supply, and predictable results week to week. Texture can feel a touch more even, and the flavour can sit on the milder end, which is great if you’re building a dish around a sauce, herbs, or a crisp coating. Wild Whiting may have a slightly more pronounced “sea” flavour and can vary a bit more in size and texture between batches. Some people describe wild fish as a bit firmer; others notice more variation depending on where and when it was caught. Neither is automatically “better” — they’re just different starting points.
Fat level is another useful lens. Whiting is generally a leaner fish, so differences can be subtle, but in broad terms farmed fish may be a little more forgiving, while wild may feel a bit firmer. Either way, Whiting rewards a gentle touch: overcooking is the main enemy of that clean flake.
Practical pairing guidance helps more than theory. If you’re doing quick midweek cooking, Whiting loves gentler heat and a bit of protection: butter, olive oil, a light batter, or a sauce that adds moisture. Tomato-based sauces, lemon-caper butter, creamy herb sauces, or a mild curry-style sauce all tend to play nicely with Whiting because they bring richness without bullying the fish. For pan-cooking, a dry surface and a calm finish keep it tender; for oven cooking, a sauced bake can be especially forgiving.
On frozenfish.direct, the shortcut is to use the label: each product’s details show whether it’s wild or farmed and where it comes from (so you’re not guessing from a category page). You’ll see lines that may include wild Whiting items and farmed Whiting items, depending on what’s stocked.
Choose by cooking method first, then by origin and method.
Which whiting cut should I buy for my plan?
Your plan decides your Whiting more than any fancy descriptor. Start with what you’re trying to do, then pick the cut that makes that outcome easiest.
For weeknight meals, go for portions. They’re portionable by design, usually consistent in size, and they cook predictably when you’re hungry and impatient. Portions are also the least fussy option when you’re serving different appetites — you can cook two, four, or six without re-engineering the whole meal.
For grilling, choose Whiting that’s thicker and can hold together — where available, look for cuts that are described as more robust (some items may be better suited to pan/oven than direct grill). The point isn’t the label, it’s physics: grilling is high heat plus movement. A thicker piece is less likely to dry out before the centre catches up, and it’s easier to turn without breaking. If grilling isn’t ideal for a particular product, the product details usually make that clear — and pan/oven gives you the same flavour goals with less drama.
For entertaining, buy larger fillets or bigger-format packs so you can plate neatly and time the cook with confidence. Bigger pieces let you control doneness with more margin, and they look better on a serving platter. This is also where “serve-a-sauce” Whiting shines, because Whiting is lean and benefits from a little richness when you’re feeding guests.
For prep-it-yourself cooking, choose whole Whiting. Whole fish is for people who want full control: you can scale, gut (if required), fillet, or cook it whole, and you decide how thick your portions are. It’s slower, but it’s satisfying — and it’s the most flexible route if you like doing your own prep.
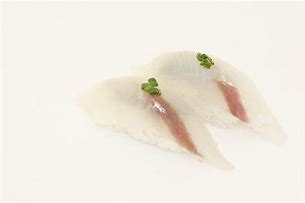
For special occasions, look at smoked/cured lines where stocked. Those products are “ready for a specific use” by design — flavour-forward, low effort, and perfect for boards, salads, pâtés, pasta, or brunch-style plates.
Two levers matter more than everything else: thickness and skin. Thickness drives timing and forgiveness; thicker pieces resist drying out. Skin changes texture and handling; skin-on can crisp and helps the fish hold together, while skinless is simpler for sauces and flaking.
If you only buy one thing: buy Whiting portions — they’re the most reliable “do-it-all” option for most kitchens.
Pick the cut that matches your heat source and your timing.
Can I cook whiting from frozen?
Yes, often you can — but method matters.
The two things that change when you cook Whiting from frozen are thickness and surface moisture. A frozen piece carries extra water on the outside (ice crystals that melt fast), and that water fights browning. At the same time, the centre warms more slowly than the surface, so a hard, high-heat sear can leave you with a damp exterior and an underdone middle — or a dry outside by the time the centre catches up. That’s why oven baking, an air-fryer, or a covered pan is usually more forgiving than going straight into a ripping-hot frying pan.
A practical, safe way to do it is simple. Take the Whiting out of any packaging first (especially plastic — never cook it in packaging unless the product specifically says it’s designed for that). If you can see surface ice or frost, a quick rinse under cold water can help, but keep it brief and get straight to drying: pat the fish very dry with kitchen paper. Dry surface equals better results, even when you start from frozen. From there, use a gentler start to bring the fish up evenly, then finish hotter to improve the outside. In the oven or air-fryer, that looks like starting in a moderate setting, then increasing heat near the end; in a pan, it’s often easiest to begin with a lid on (steam helps the centre catch up), then remove the lid and finish uncovered to drive off moisture and improve colour. Seasoning can go on once the surface is dry — or partway through if the surface is still wet at the start.
You’ll know Whiting is ready when the flesh turns opaque, flakes cleanly with gentle pressure, and feels springy rather than jelly-like. If you’re unsure, follow the on-pack guidance and adjust to thickness — thicker pieces simply need more gentle time before the finish.
When should you not cook from frozen? If you’re working with very thick pieces and you want a truly crisp, restaurant-style sear, thawing first gives you better control. Also, speciality cured/smoked or ready-to-eat style products should be handled exactly as the product details advise — those are a different category with different expectations.
Frozen-to-oven is the weeknight cheat code when you need Whiting now.
How long does frozen whiting last, and how do I avoid freezer burn?
Frozen Whiting can stay safe to eat for a long time when it’s kept properly frozen, but quality is what slowly changes. Over time you may notice a drop in sweetness, a drier bite, or a slightly “older freezer” taste — not because it suddenly becomes unsafe, but because the fish is gradually losing moisture and picking up odours if it’s exposed to air. That’s the key difference: safety is about temperature control, while quality is about time, packaging, and air exposure.
Freezer burn is the classic quality killer. It isn’t “burning” in the heat sense — it’s dehydration caused by air exposure in the freezer. Water escapes from the surface of the fish, then re-freezes elsewhere as crystals. You’ll usually spot it as dry or pale patches, a duller colour, or frosty crystals inside the pack. Cooked, freezer-burnt Whiting can turn tougher, drier, and less flaky, sometimes with a faint stale-freezer note. It won’t usually make the fish dangerous on its own, but it can make it disappointing — and Whiting is at its best when the texture stays clean and tender.
Avoiding freezer burn is mostly about treating air like the enemy. Keep packs sealed until you need them, and minimise air exposure once opened. If you’re not using the whole pack, re-seal it tightly, or move portions into an airtight freezer bag or container with as little trapped air as possible. Store flat where you can — it freezes and stays cold more evenly, stacks neatly, and gets less bashed about in the drawer. Keep your freezer stable (frequent warming and re-freezing increases ice crystals and texture loss), and don’t leave fish sitting out while you rummage around: take it out, close the freezer, done.
Stock rotation helps more than people think. Put newer packs behind older ones, and use the older ones first. If the product is vacuum packed, that’s a real advantage because the reduced air inside the pack helps slow dehydration — it’s one of the easiest ways to protect Whiting’s texture in the freezer. For best guidance on shelf life, always check the on-pack storage instructions and date markings for that specific item.
Good packaging and steady cold are what keep Whiting tasting like Whiting.